Page 7
Page 1 - Page 2 - Page 3 - Page 4 - Page 5 - Page 6 - Page 7 - Page 8 - Page 9 - Page 10
Page 11 - Page 12 - Page 13 - Page 14 - Page 15 - Page 16 - Page 17 - Page 18 - Page 19
Page 20 - Page 21 - Page 22 - Page 23 - Page 24 - Page 25
November 2005
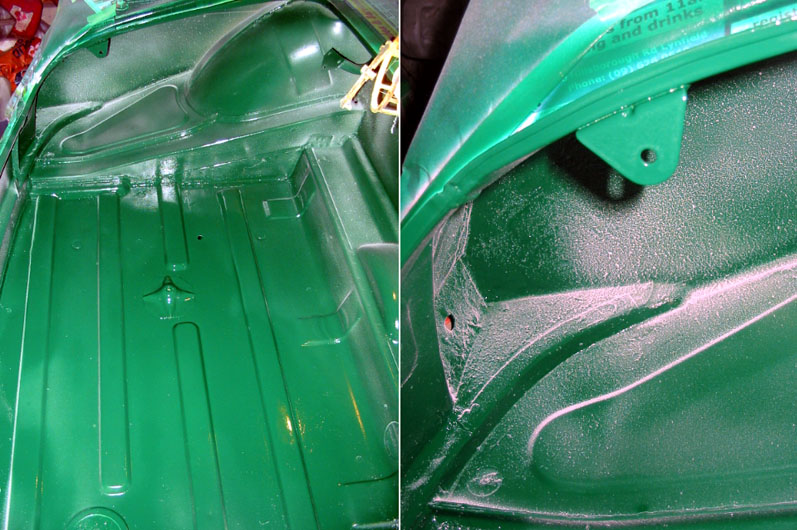
MGs often seem to rust in the rear boot corners. I think they leak around the rear lights. Mine
was no different. I bought replacement panels for both sides and made up patch pieces to fix
the holes left when cutting out the rusty steel. The grey paint is a zinc rich primer I
sprayed all around the seams so that it will creep in while wet and protect the steel. I will
wire brush the entire boot now all the repairs are done. I also had to cut and weld in a few
patches into the boot floor. I have a brand new fuel tank to go on the underside. Once I wire
brush the floor I will seam seal all around the edges and fill any gaps. Then I plan to paint with
Hammerite number 1 rust beater which I used very successfully on my old GT when I had it. I
will top coat that with Dulon paint I had mixed up to match the colour I will do the outside
of the car in eventually. This isn't a show car so the boot need not be finished to as high
a finish as the outside of the car. I just want it clean and tidy. I will also add sound
deadening material to to help with vibrations and rattles.
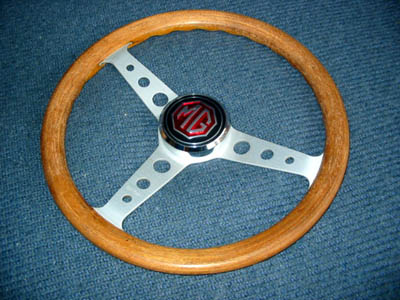
My first experiment at getting something chromed. I machined up a hub center for my Momo wheel from
a hefty piece of steel. I then bought a MG badge off eBay to go in the middle of it. It is
attached to the middle of the wheel with a cunning method which hopefully means no one can steal it
or the steering wheel as the middle covers the 6 machine screws that hold the wheel to the hub.
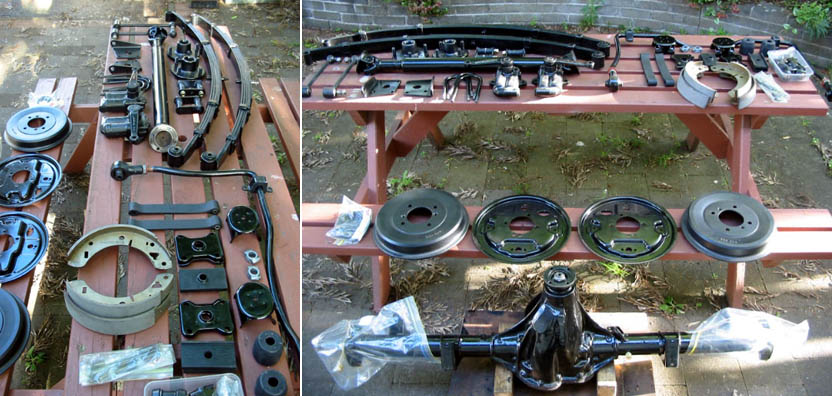
While waiting for good weather to continue work on the body (my garage is so small to work on the
back I need to have the door open) I cleaned and painted all the bits and pieces that make up
the rear end mechanicals. Here are all the parts laid out. I rebuilt the diff and repainted it.
The half shafts are in it but the end plates aren't attached yet so I have plastic bags on the
ends to keep things nice and clean. I had the drive shaft straightened, fitted with new u-joints
and dynamically balanced. I am replacing all the rubbers and the drop links to the shocks. The
shocks themselves I drained and refilled with new oil. The rear springs I shall reuse for now
until I decide how to lower the car. I simply cleaned and repainted them. It is so nice being
able to reassemble all new and clean parts back on the car.
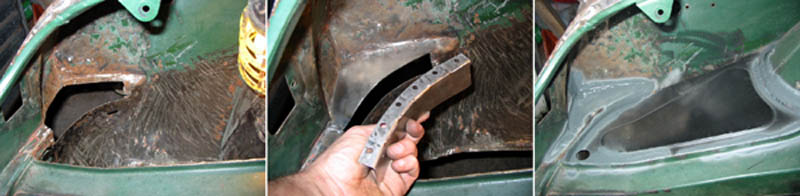
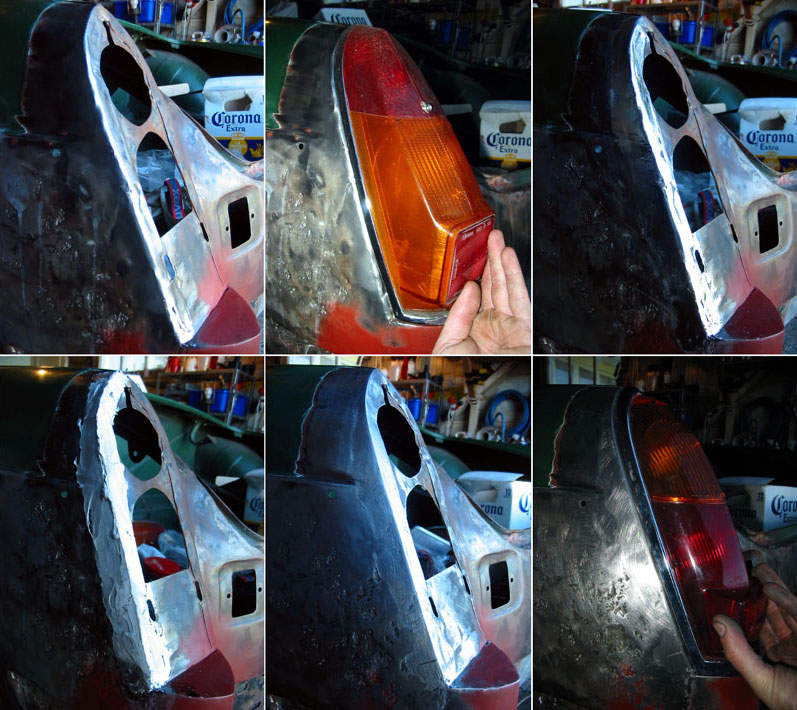
In order to get to that point I need to finish the major body work. Today I welded in the pieces
under the tail lights that rubber bumper cars are missing. These pods are available as a
replacement part for rust repair and RB to CB conversions. They do need some trimming to fit
as well as top and bottom pieces made for them from flat steel. I drilled a 1/2 inch hole
from inside the car under the lights so I can squirt rust proofing into the pods after I am
done. Unfortunately they are a little short. With the original style lights fitted the light
sticks out a little past the pod. I will need to build up the difference but that shouldn't be
a problem since I need to do that anyway when I attach the rear Sebring valence.
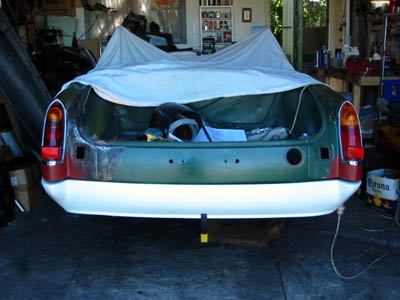
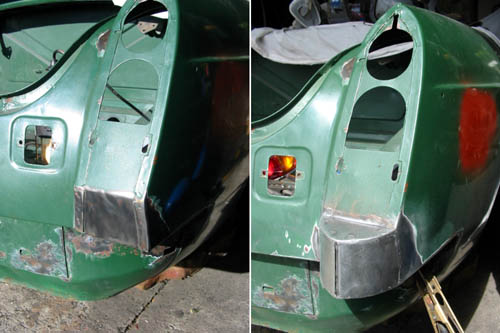
And here is the first quick fitting of the rear valence. Well, not fitting really! I expected
that though and fully expected I would need to do a lot of fettling myself. The valence is made
from fibreglass and it will need to be bonded to the steel of the car and smoothed over so it
all looks like one piece. I think you simply bolt and glass the piece to the car then use a lot
of filler to smooth it all out. Since the left rear corner was badly dinged and will need lots
of filling anyway and I need to extend out the under light pods slightly this shouldn't be a
a big problem. I don't mind using filler as long as there is no rusty steel under it! This pic
does give a first tentative look at how the rear valence will be though. I am very tempted to
make up a mold from the front and rear valences so that if necessary in the future I can make
replacements. They aren't cheap and the way people these days think it is perfectly acceptable
to park by braille I imagine they will be smashed at some point in the future. I will never,
ever park her in Newmarket. I don't want some bored housewife in her Remuera tractor messing up
my Vicky!
This picture also nicely shows the amount of space I don't have. I only have a single car garage
but that will hopefully soon change. I am having a 6m by 6m double garage built at home. I will
have lots more space to work and will be including some much needed features like good lighting,
an engine hoist or chain, a quiet box for the air compressor, lots of power points and room for all
my projects. I can finally finish the car. And the minibike. And the jet engine/beer cooler.
And maybe even R2D2.
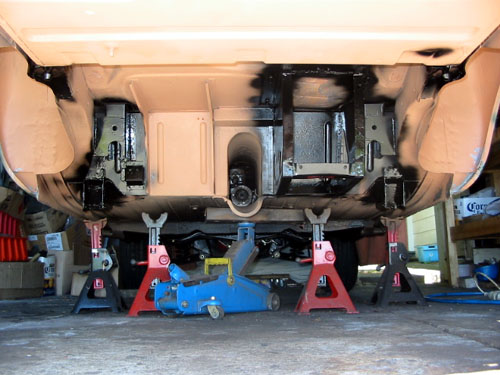
Today I sprayed a rust killing metal conditioner on the underside then carefully washed and degreased
it all (while lying under it). I then sprayed with Hammerite Number One Rust Beater which is a
rust inhibiting primer. After that I also sprayed black engine enamel on the bump stop points,
suspension and roll bar mount points, the battery box and the exhaust mounting points. These are
places I don't want to cover in underseal when I spray the rest of the underside.
December 2005
On the corner of the car that has been in a ding I wanted to rebuild the edge around the light fittings
so it was square again. One way would be to use plastic filler but i decided to use lead. This is
meant to be a old fashioned way of doing things but I quite enjoy it and the finished result is
much more robust than filler. First you have to clean everything really well with a wire brush. All the
rust must be removed. Next you tin the surface. I use a stiff brush to paint on a thick coat of flux.
This is a paste made from the flux itself and solder dust. You heat it up then once the solder in it
flows nicely you wipe it all off with a clean rag leaving a nice tinned and shiny surface. Next you
add extra solder. This is the tricky bit. You carefully heat up the surface and also heat up the solder
which comes in long sticks about about 10mm square. The solder will go completely runny but the aim is
to get it to the consistency of soft butter. You heat the surface and the rod then stick blobs of solder
to the surface. It is hard to get the heat just right so the solder sticks but not to hot it all just
melts and runs off. Once you have a series of blobs stuck to the steel you then heat it up again and
use a wooden paddle soaked in clean oil (originally tallow but where the hell do you get that these
days?) to smooth the lead over the surface. You build up a nice thick layer. Once that has cooled I use
a special soft metal file to shape the surface. Finally you hand sand it with rough then progressively
finer paper. A little plastic filler just to smooth it out although a LOT less than without the lead!
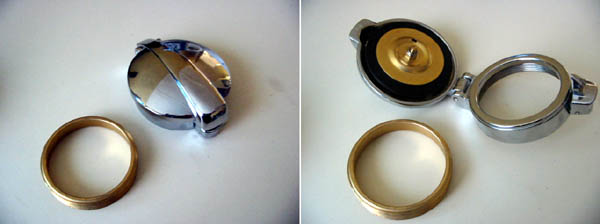
This is the flip style Monza fuel cap I got off eBay. Normally these things are stupidly expensive but I
got it for $56NZ including shipping. An absolute bargain! It has a brass ring the the cap screws to.
I found a piece of 57mm exhaust pipe fits this perfectly and is the same diameter as the original
fuel filler pipe. I will remove the aluminium coating from the end and slide on the brass collar and
solder it in place.
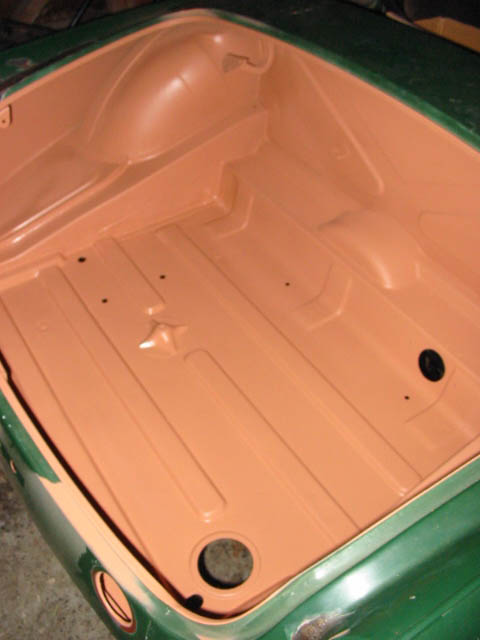
The boot painted with Hammerite Number One Rustbeater. I will top coat it with colour and clearcoat.
Well, I painted the boot. The colour coat went on great. Clearcoat though went a little pear shaped. For
some reason the clear went white and fluffy in some places. It is a bit like spray snow! I am not sure
if I had the pressure too high or the flow rate too high. I adjusted things a bit then it started to
behave but the damage is done. I might be able to sand it out although it doesn't really matter too much
since I want to stick on some sound deadening mat and then carpet. I do have more colour and clear so
I can sand the white away then spray a few more coats.
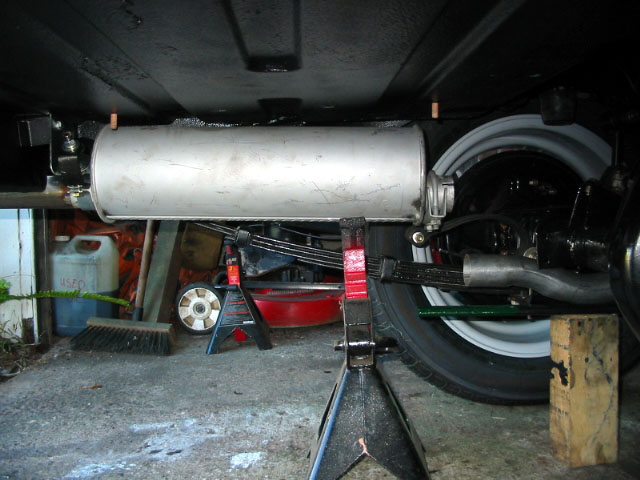
Another small problem. Because the rear end is way too high the exhaust doesn't line up at all. I think I need
to lower the car about 3 inches at the rear. Not sure how to do that exactly but I think the best way
might be with new springs or perhaps get the old ones reshaped.
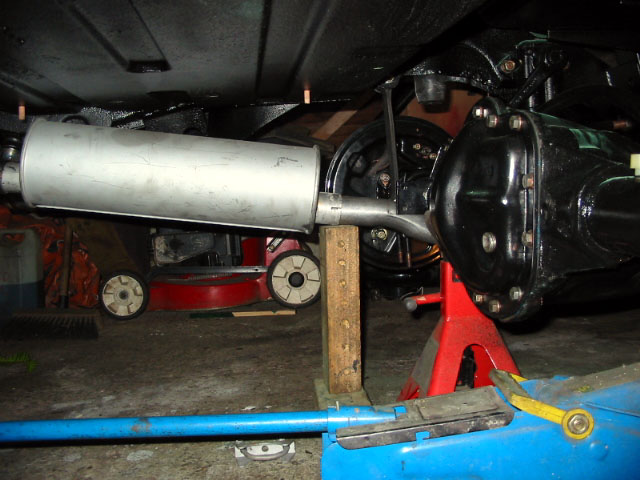
Curiousier and curiouser. I have taken the springs off to be reshaped. I will have the 3 inches taken out of them.
But I still need to sort out the exhaust. This is a pic of the real axle hanging by it's rebound straps which
should be the lowest point the axle will ever go. These are chrome bumper straps too which are a little shorter
than the original rubber bumper ones. But I still can't get the exhaust to line up nicely. Should the muffler
be parallel to the boot floor? The only way I can get it to fit is at an angle as shown here. I could weld up
my own curved pipe so the muffler can lie flat and the tube comes up to it but then it might foul the cable for
the handbrake. I wish I still had my GT to check how it was. Hmmm, one of the board of directors of my company
had a nice little red B. Perhaps next time it is in the car park I can go have a quick lie down underneath it!
Ah, thanks to the MGBBS I now know it is supposed to be at an angle. I think it is just more obvious on mine
without the bumpers to hide the pipe where it pokes from the back of the car. I might try to get a curved tip
for the end of the exhaust to help hide it.
Page 1 - Page 2 - Page 3 - Page 4 - Page 5 - Page 6 - Page 7 - Page 8 - Page 9 - Page 10
Page 11 - Page 12 - Page 13 - Page 14 - Page 15 - Page 16 - Page 17 - Page 18 - Page 19
Page 20 - Page 21 - Page 22 - Page 23 - Page 24 - Page 25